
If you want to know about the materials and their applications or wall cladding or types of footing, please click the link.
Wall finishes refer to the material used to cover the surface of the interior walls in a building. There are many different types of wall finishes, each with their own unique look and benefits. Some common wall finishes include:
1) Finishes
- Finishing is to apply decoration and trim to the internal perimeter of rooms and spaces such as wall, floor and ceilings.
- It is running at the end of construction activity and it needs a good skill in doing this job to make sure it is in a good performance.
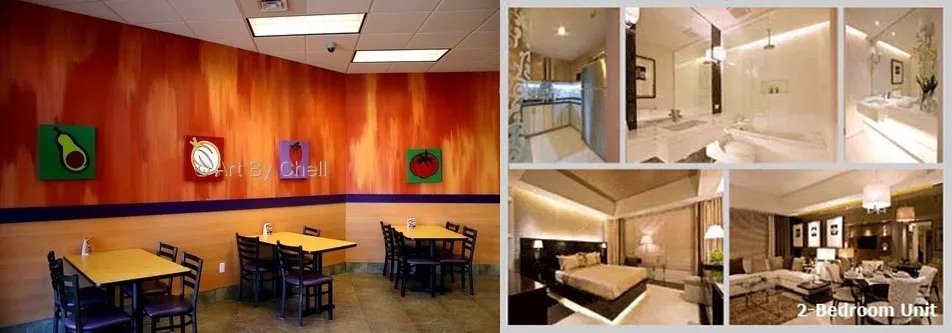
2) Wall finishes
- The term “wall finishes” is exactly what the term sounds like: it is the final touches placed on a wall that ‘finishes’ the wall with an acceptable visual look.
- The finish to a wall can range from simple paint to expensive wallpaper to elaborate plastering, but the end result will always be the same.
3) Function
- To reduce the amount of light penetration.
- To make sure the construction building is high in quality.
- For decoration and nice arrangement.
- To provide a flat and smooth surface.
- To protect slab and concrete.
4) Types of wall finishes
There are several methods to finish a wall in present time:
- Plastering
- Painting
- Wall papers
- Mural
- Cladding
i) Plastering
What is plaster?
- Plaster means an internal or external application of solid material comprising sand, lime and various additives, applied wet in one or more coats to produce a smooth, hard surface finish.
- It Is done as a weather proofing for brick wall which are subjected to adverse climatic conditions
- Plaster is used to render, turn, an uneven surface into a smooth, level surface by plastering a material over its surface.
- Mortar is the material to perform the plastering work.
Why plastering?
- To provide an even, smooth, regular, clean and durable finished surface.
- To preserve and protect this surfaces from atmospheric influences by acting as a protective coating.
- To conceal the defective workmanship.
- To cover up the use of interior quality and porous material and the joints formed in the masonry work.
- To provide a satisfactory base or ground for decorating the surface by applying whitewashing, colour washing, painting or distempering.
- In case of internal plastering, the basic object is to protect the surface against dust.
Mortar for plastering
- Mixture ratio 1:3 (cement : sand) – Apply at the place which sustain load such as factory = Thickness 25 mm
- Mixture ratio 1:4 (cement : sand) – At hall and the park. = Thickness 16 mm
- Mixture ratio 1:5 (cement : sand) – Plastering at home = Thickness minimum 12 mm
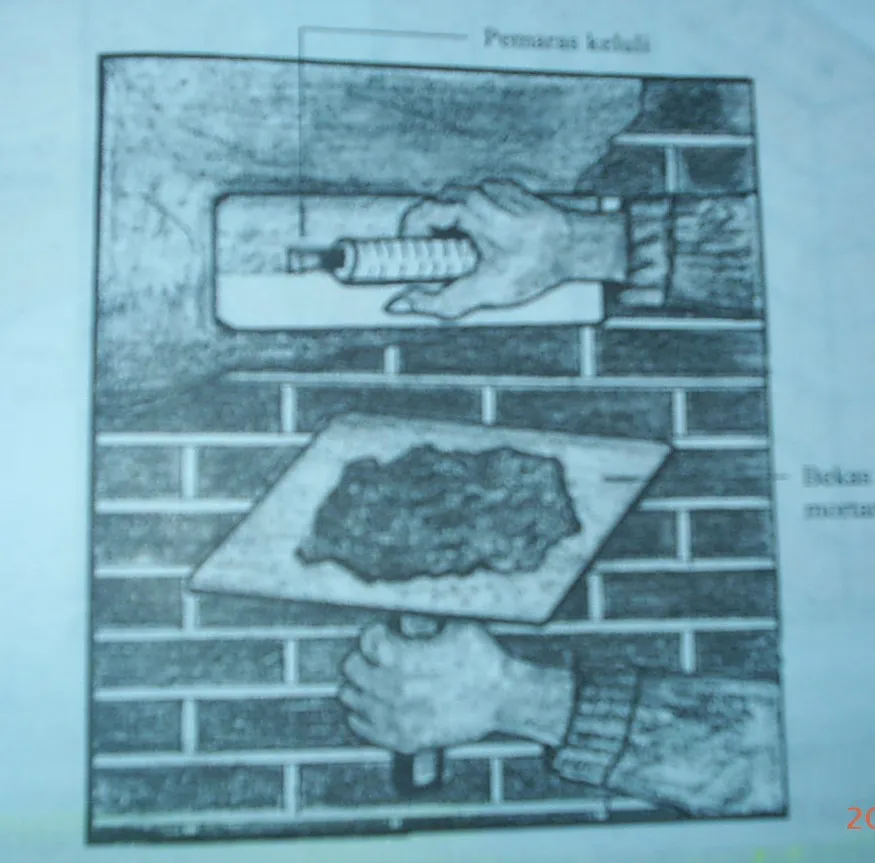
Methods of plastering
- Plastering can be done by apply it layer by layer. There are three layers:
- First layer: render layer – thickness between 9 mm to 12 mm.
- Second layer: floating layer – surface is plastered and flatten with “pemaras kayu panjang” and “pemaras keluli”.
- Third layer: finish layer – surface is smooth by melt cement and it is also can be added with chalk to produce flat and smooth layer.
ii) Painting
- Painting is one of the easiest and least expensive way to change a dull, boring room into a bright, clean room.
- Painting is the practice of applying paint, pigment, colour or other medium to a surface (support base). In art, the term describes both the act and the result, which is called a painting.
- Paintings may have for their support such surfaces as walls, paper, canvas, wood, glass, clay or concrete.
- Painting is a mode of expression, and the forms are numerous. Drawing, composition or abstraction and other aesthetics may serve conceptual intention of the practitioner.
Desirable properties of paints
The various factors of importance are:
- Consistency – A paint too thick will drag or streak while too thin a paint will tear.
- Spreading power – It is the covering capacity measured in terms of sqm that can be covered by one litre of the paint material.
- Rate of drying – Paint are to become dry in nine hours and hard dry in twenty four hours.
- Durability – This quality is judged by the length of time during which the paint coating maintains its decorative and protective values.
Types of paints ( With properties )
- Anti-corrosive paints – It is used to protect metal structures. It consists of oil, strong drier, a coloring mixed with very fine sand and linseed oil is used as vehicle.
- Cellulose paints – It is prepared from nitrogen cotton, celluloid sheets, photographic films, and amyl acetate substitutes. The paint gives very smooth finish.
- Colloidal paints – It takes more time to settle and in this process it penetrates through the surface.
- Cement-based paints – This paint is a type of water paint in which white or colored cement forms the base. The paint is very much useful for painting external surfaces since it is water proof.
- Emulsion paints – It contains vehicles such as polyvinyl lacerate, styrene, alkyd resin and other synthetic resins. It has good workability and high durability.
- Enamel paints – It contains 4 basic constituents- metallic oxide, oil, petroleum spirit and resinous matter. The paint dries slowly, but on drying it produces a hard, impervious, glossy, elastic smooth and durable film.
- Oil paints – Its 2 principal constituents are base and vehicle. It is used in three coats: prime coat, under coat and finishing coat. They are cheap, easy to apply and possess good capacity and low gloss.
- Synthetic rubber paints – These paints consist of synthetic resins dissolved in appropriate solvents and mixer with suitable pigments. It dries quickly and uniform color is maintained.
- Plastic paints – These paints contains plastic as the base. They have the quality of quick drying, high covering power and decorative appearance.
Application – Method of painting
- Preparation of the surface: Painting the room is the smallest part of the job. Preparation of the room will be the biggest one.
- If possible start with an empty room or try to remove as many obstacles as possible.
- Cover all surfaces that will not be painted.
- If possible start with an empty room or try to remove as many obstacles as possible. Cover all surfaces that will not be painted.
Other types of paint
- Oil-based paints = a) Priming paints, b) Undercoating paints, c) Finishing paints
Priming Paints
- First coat paints used to seal the surface.
- Protect the surface against damp air.
- Act as barrier to prevent any chemical action between the surface and the finishing coats.
- Give smooth surface for the subsequent coats.
- Produced for application to wood, metal and plastered surfaces.
Undercoating Paints
- Used to build up the protective coating.
- To provide the correct surface for the finishing coats.
- To obtain a good finishing colour it is essential to use an undercoat of the type and colour recommended by the manufacture.
Finishing Paints
- A wide range of colours and finishes including matt, semi-matt, eggshell, satin, gloss and enamel are available.
- Contain a synthetics resin: easily applied, quick drying, have good adhesive properties
- Polyurethane paints
- Contain a polyurethane resins: quick drying paints, giving a heat-resisting surface
- They can be used on timber surfaces as a primer and undercoat.
- Water-based paints
- Use come under a general classification of emulsion paints.
- Can be obtain in matt, eggshell, semi-gloss and gloss finishes.
- Quick drying.
- General use is for large flat areas such as ceilings and walls.
- Varnishes and stains
- Varnishes form a clear, glossy or matt, tough film over a surface and are a solution of resins and oil.
- Their application similar to oil-based paints.
- The type of resin used, together with the correct ratio of oil content, forms the various durabilities and finishes available.
Characteristics of paints
- It should form had and durable surface
- It should give attractive appearance
- It should be cheap and readily available
- It should be such that it can be applied easily to the surfaces
- It should dry in reasonable time
- It should be stable for a longer period
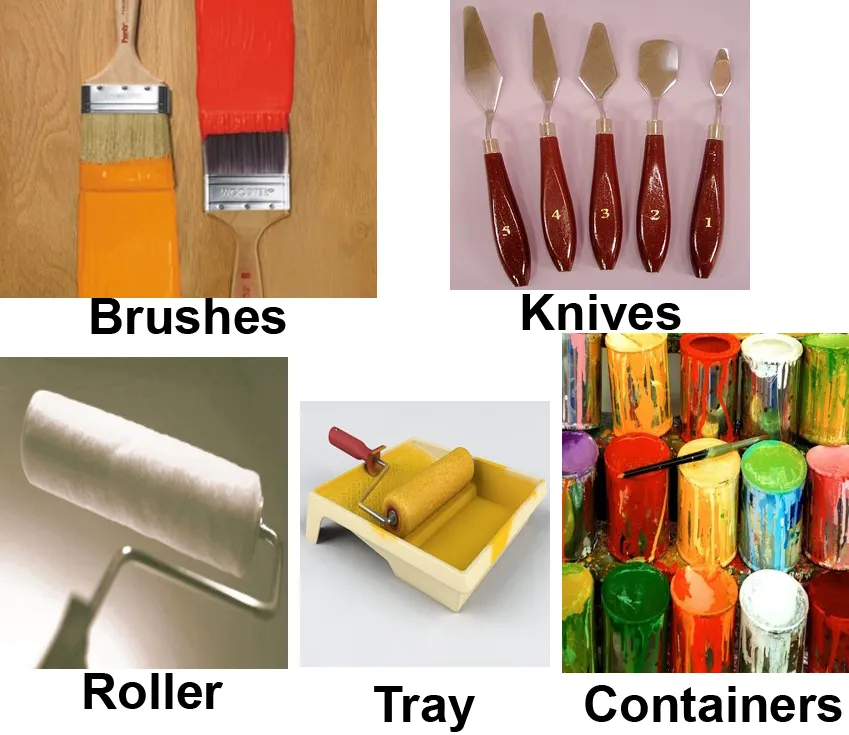
Painter’s kit
Application of paint
- Décor selection: The colour combination and effect should be selected keeping the rest of the colours and décor elements present in the room in mind (furniture, carpet, curtains etc.)
- Surface preparation: Complete system of Primer+ Putty + Primer should be undertaken before the base coat is applied. The surface should subsequently be well prepared, smooth and non absorbent.
- Base coat application: only specified basecoat of luxury emulsion should be used. No other matt paints to be used as they may be too absorbent impairing the production of the desired effect.
- Top coat application: Working in pairs produces best results, while one applies paints, the other person creates the special effect. It is always better to first lightly wet the wall with a flat sponge to take care of surface absorption and have ease of application. Apply top coat in small manageable section (3ftX3ft) and not the entire wall at the time. Leave wet edges- margin of unworked paint at the end of each section to allow blending with the next section of paint. Speed is as topcoat starts to dry in 8-12 minutes. If the leading edges dries, you will have a lap mark. It is important to stand back and look at the wall every now and then to make sure that a uniform effect has been has been achieved.
How to paint a brick wall
- Preparing the wall for painting is very important. Begin by scraping off any loose paint from the brick wall if it was previously painted. This will result in a smoother surface when completed.
- Since brick is porous, it can absorb a lot of dirt. Using soap and water, wash down the entire brick wall including the grout. Go over it a second time with plain water to remove any soap that was left behind. If the wall is outdoors, it can be washed with a garden hose. Allow this to dry.
- Vacuum the brick wall to remove any further dirt or grime that was left behind after cleaning. If the wall is outdoors, this can be done with a leaf blower.
- With the paint brush, apply the primer to the brick wall making sure to get into all of the grout lines. This primer coat is important because it will keep the original colour of the brick from bleeding through to the new paint colour. Allow this to thoroughly dry.
- Again, using the paint brush, apply the desired colour of paint to the brick wall including the grout lines. Applying a good, thick coat may eliminate the need for a second coat. Let this completely dry.
- If necessary, apply a second coat of paint to the brick wall. When the wall is dry, spray on the clear sealer. Spraying this very lightly will protect the new paint without creating a glossy finish.
Defects and causes in painting
- Blistering & Bubbles- It is a defect caused due to the formation of bubbles under the film of paint by entrapped moisture.

- Bloom – In this defect, dull patches are formed on finished polished surface. It may be due to defect in paint or due to bad ventilation.

- Crawling or sagging – It occurs due to the application of too thick a paint.
- Fading – This is the gradual loss of color of paint, due to the effect of sunlight on the pigments of the paint.
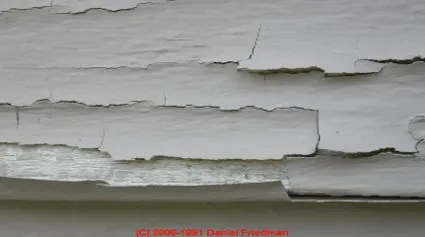
- Flaking – It is the dislocation or loosening of some portion of the painted surface, resulting from poor adhesion.
- Flashing – It is the formation of glossy patches on the painted surface, resulting from bad workmanship, cheap paint or weather action.

- Grinning – It is caused when the final coat does not have sufficient opacity so that background is clearly seen.

- Running – It occurs when the surface to this the paint runs back and leaves to be painted is too smooth. Due small areas o the surface uncovered.
- Saponification – This is the formation of soap patches on the painted surface due to chemical action of alkalies.
Asian paints
- Acrylic disptemper: Water based interior wall finish giving smooth, matt look to the walls.
- Enamel: Solvent based paint giving a long lasting glossy finish to wooden and metal furniture, doors etc.
- Royale luxury emulsion: exquisite emulsion paints providing a luxurious finish and silky glowing appearance to walls.
- Metallic: a warm colour royale gold takes on different characters, from bright and cheerful to traditional.
Dulux
- Satin finish(enamel) : gives an elegant and rich finish to walls, woods and metals.
- Acrylic emulsion: high quality matt finish emulsion paint, smooth finish giving walls an expensive look.
- Stay clean: washable and stain resistant paint with unique latex film keeping walls free from fungus and bacteria.
- Light space: unique patented Lumitec technology, washable and fungus resistant, makes room brighter giving a sense of space.
- Velvet touch: walls reflect the sheer luxury and smoothness of velvet, unique pearl glow finish giving soft sheen to walls.
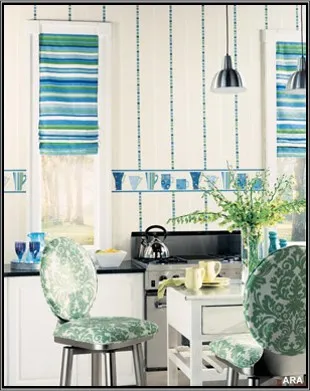
iii) Wall papers

- Wallpaper was recommended in the rooms of house, and especially in parlors.
- The dominant hue in the wallpaper determined the color of paint used on the ceiling and woodwork.
- The designs included
- architectural papers,
- landscape papers,
- natural subjects like plants and animals, historical or biographical containing figures or portraits,
- ashlar papers representing cut stone and papers imitating woven fabrics such as damask.
- Another popular paper was called “fresco” which imitated panels, cornices, friezes, moldings, columns and dadoes.
Uses of wallpaper
- Wallpapers are used for aesthetic purpose
- They used in residences, offices, shops but largely used in hotels.
- They need high maintenance and need care from dampness.
- Aarcee and elemantoo are 2 major companies of wallpapers
How much wallpaper will i need?
- A single roll of wallpaper is approximately 18 inches wide by 5 yards long and covers 22 square feet. Each roll is 15 linear feet of paper.
- Measure the wall height and perimeter of the room. Multiply the wall height by the perimeter to calculate total square feet of wall space. Divide the total square feet of wall space by 22 to figure the number of rolls needed. The formula is: number of rolls = (wall height x perimeter)/22.
- Do not subtract doors and windows when measuring the room. The extra paper is required for matching the pattern. For tripartite designs, the wall height is measured from the dado to the frieze.
- For borders, friezes and dadoes, measure the perimeter of the room or the dimensions of the area to be enclosed with the border.
Types and price
- Wallpapers are not named as such.
- Different companies have given them name on the basis of their own consideration.
- Cheapest available wallpaper is 29/sq.ft.
- And the most expensive wallpaper available is of 600/sq.ft.
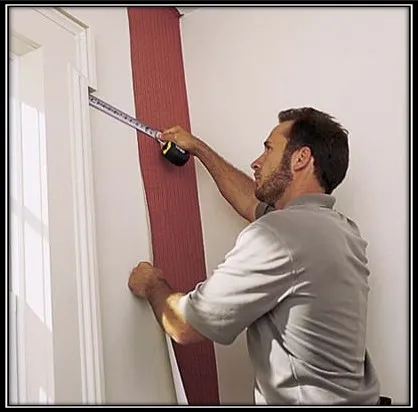
Installation of wallpaper
- Apply wallpaper paste
- Paint the whole room with a wall primer/sizer.
- Unroll the wallpaper. As you do, check for defects and drag the paper against the edge of your worktable to take away the curl.
- Cut the paper into sheets 4 inches longer than the height of your walls. Cut in the same place on the repeat so patterns on adjacent sheets will line up.
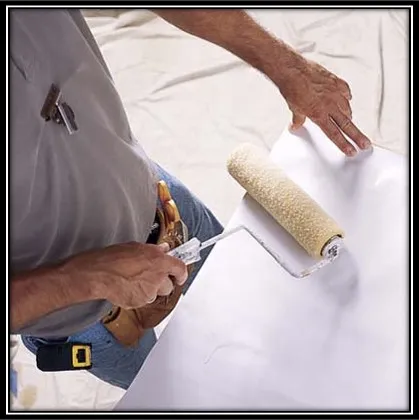
- Lay a cut sheet on the table, face down. Using a paint roller, apply a thin film of clear premixed wallpaper paste on the back of the paper, ABOVE.
Tip: Don’t allow paste to get on the table or it will mar the next sheet (wipe it off with a barely damp sponge if it does). Slide the paper all the way to the edge of the table to apply paste to the ends and edges.
- Book the paper
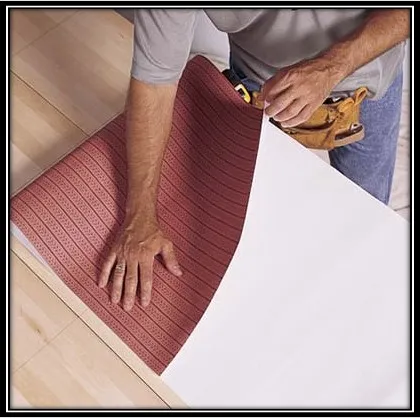
- Fold the pasted back of the paper onto itself, top and bottom ends meeting in the middle. Make sure the side edges line up perfectly. Smooth the paper onto itself as much as you can without creasing the folds.
- Set the paper aside to allow the paste to soak in and the paper to relax. Be sure to follow the exact booking time recommended on the wallpaper’s label, which differs depending on its content (more for vinyl-coated wall coverings, less for uncoated papers).
- Align the first strip in the corner
- Start in a corner near a door. If the door is far from the corner, draw a reference line parallel to the door near the corner.
- Unfold the top of the booked paper and hang it on the wall. Overlap about 2 inches at the ceiling and 1/8 inch in the corner. Lightly press it in place.
- Unfold the bottom of the book and let it hang. Check the measurement between the paper and the door casing or reference line. Adjust the paper to keep it parallel to the door but still overlapping at least ½ inch in the corner.
- Tuck and trim the paper
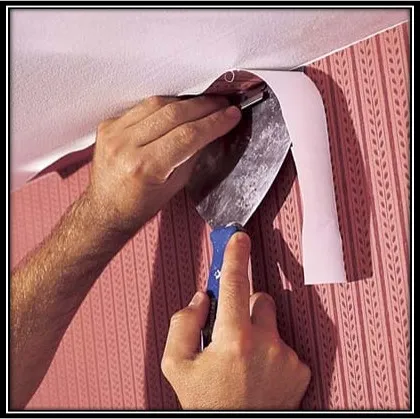
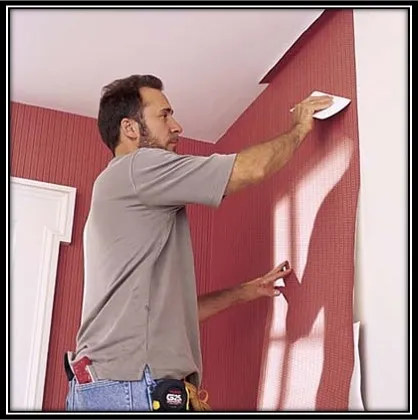
- Once the sheet is aligned, use the edge of a paper smoother to tuck the paper into the corner at the ceiling. Then, working from the top down, sweep the smoother over the entire sheet. (Don’t press so hard that you push out glue.)
- Trim the excess paper at the ceiling: Push a 6-inch taping knife into the joint between the wall and ceiling. Using a razor, cut above the knife to trim off the excess. Work slowly. Alternate between cutting and moving the knife. Do not slide the razor and knife together. Continue papering to a point above the door.
- Continue papering around corner
- On the adjacent wall, draw a plumb line (if there’s no door or window).
- Hang a strip in the corner. Overlap the existing piece on the adjacent wall by 1/8 inch. Measure to the plumb line and adjust the paper to keep the distance equal. Smooth the paper. Trim at the ceiling and trim the corner.
- Hang the next strip of paper. Unfold the top of the book and place it on the wall. Match the pattern as closely as possible, leaving just a hair’s breadth between the sheets.
Tip: Push air bubbles out by sweeping the paper smoother from the center out to the edges. Wipe off paste on the surface with a sponge.
- Close the seams
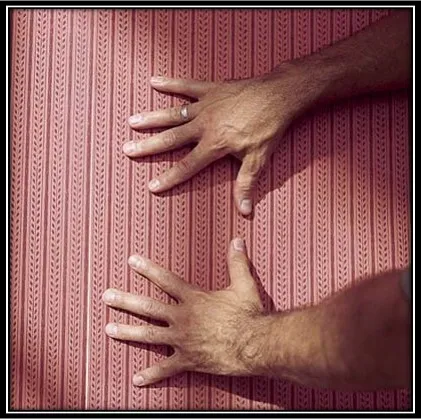
- Lightly press the top of the paper to the wall. Then lightly roll the seam with a seam roller to flatten down the edges. Now use the tips of your fingers to push the seam closed, ABOVE.
- Unfold the bottom of the sheet and finish matching and closing the seam. Then tightly roll down the entire seam, working a full 3 inches in from the edge. This locks the seam, keeping it from opening as you smooth the paper.
- Smooth the whole sheet. Continue papering the room, overlapping and trimming corners as shown in Step 4.
Tip: If the booked end of the strip starts to dry out before you hang it, wipe the wall with a damp sponge. This will remoisten the paste when you hang the paper.
- Cut in around moldings
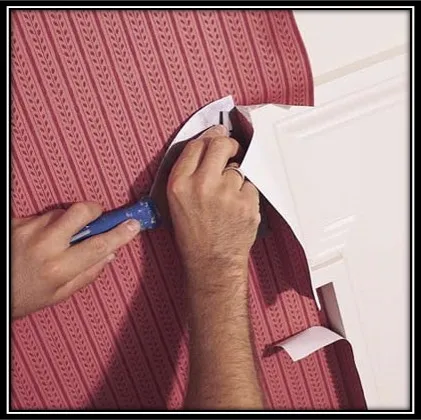
- At doors and windows, let the paper overlap the moulding by at least an inch.
- Using the razor, make a relief cut in the paper. Carefully run the razor from the moulding corner out to the edge of the paper. Use the moulding as a guide.
- Press the cut edge tight in the joint between the moulding and the wall.
- Trim the excess paper flap with a taping knife and razor, ABOVE. Smooth down the whole sheet.
Tip: Hide small cutting errors on darker papers by coloring the wall or the white edge of the paper with a marker that matches the paper. Some pros even color all the paper’s edges so seams are not as evident should the paper shrink as it dries.
- Cover switch and outlet plates
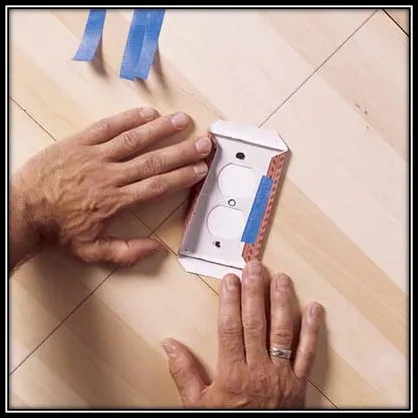
- Paper the cover plates of electrical fixtures to make them disappear. Cut a piece of wallpaper larger than the plate. Cut from the part of the pattern that matches the paper on the wall around the switch.
- Apply paste to the plate, then lay it face down on the paper. Hold them both on the wall and adjust the paper to match the pattern on the wall.
- Hold the paper and turn the plate face down. Cut off the corners 1/8 inch away from the plate. Wrap the paper over the plate and tape it on, ABOVE.
- Cut out the switch or receptacle holes with a razor. Make Xs at the screw holes. Screw the plates back on the wall.
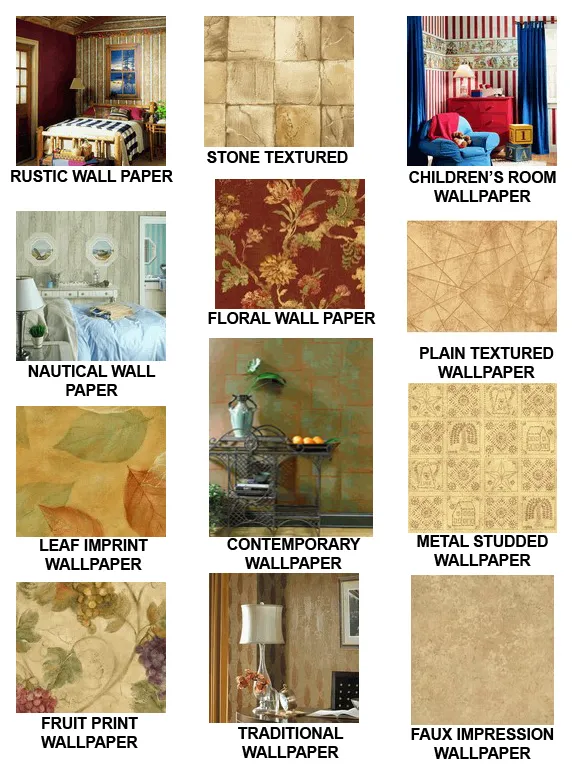
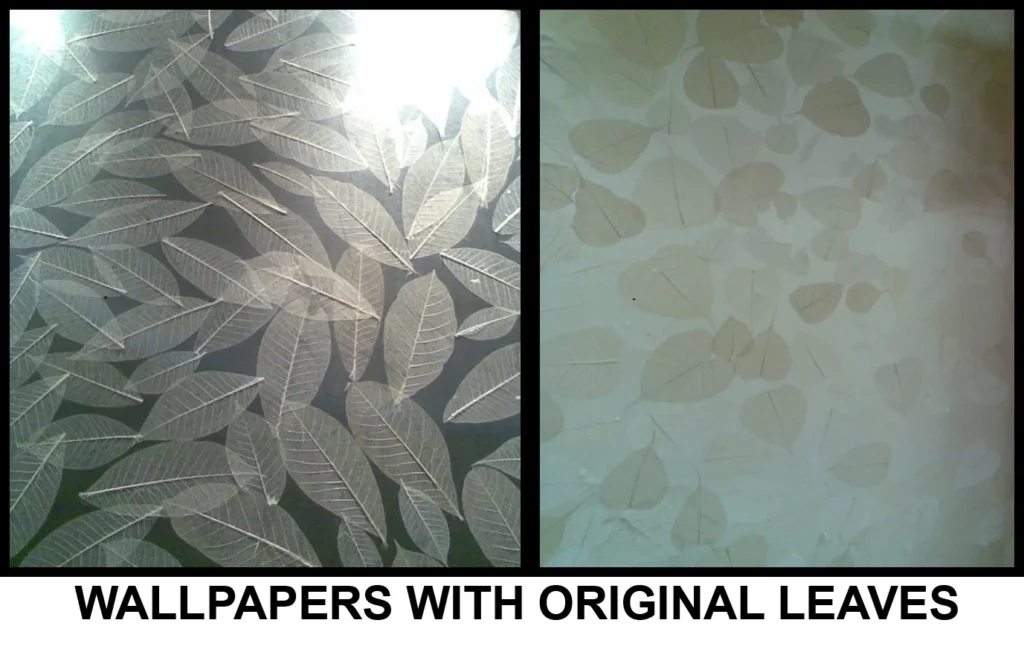
Some patterns of wall papers
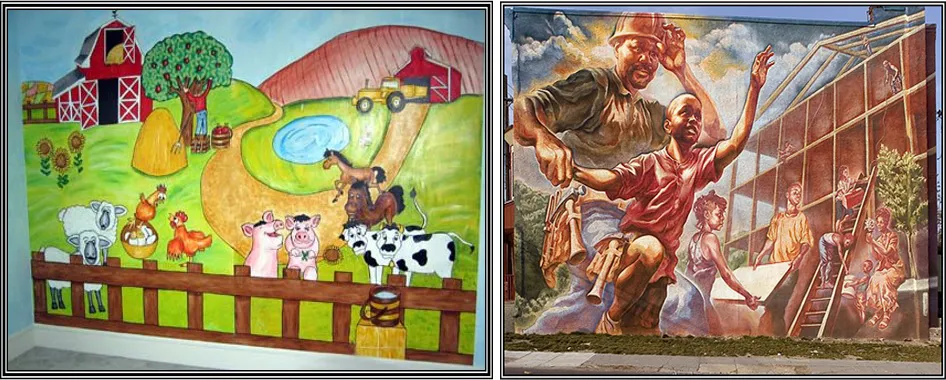
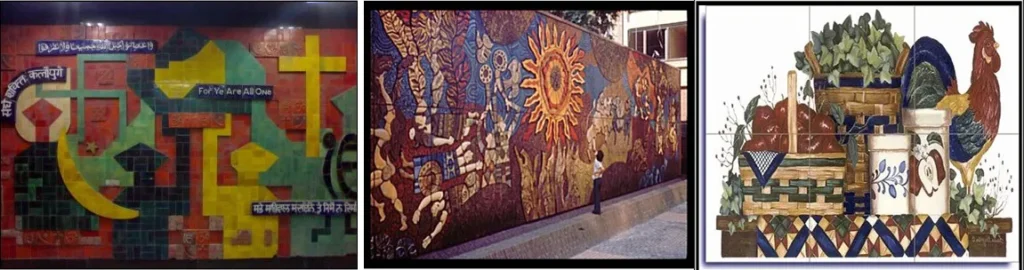
iv) Mural
- A mural is a painting on a wall, ceiling, or other large permanent surface.
- Murals are commonly used as decorations, to brighten up the otherwise dull and staid walls. They add color to the walls and create a delightful atmosphere in the rooms.
- Wall murals lend a beautiful and colorful ambience to the interiors and the exteriors of a home.
Types of murals
- Painted murals
- Tile murals
- Ceramic murals
Painted mural
- Painted murals are those in which the surface of the wall is painted. The basis of the design to be painted on the wall is pre-decided. The designs may be created in clay or on ceramic leaves, before creating the actual murals on the wall.
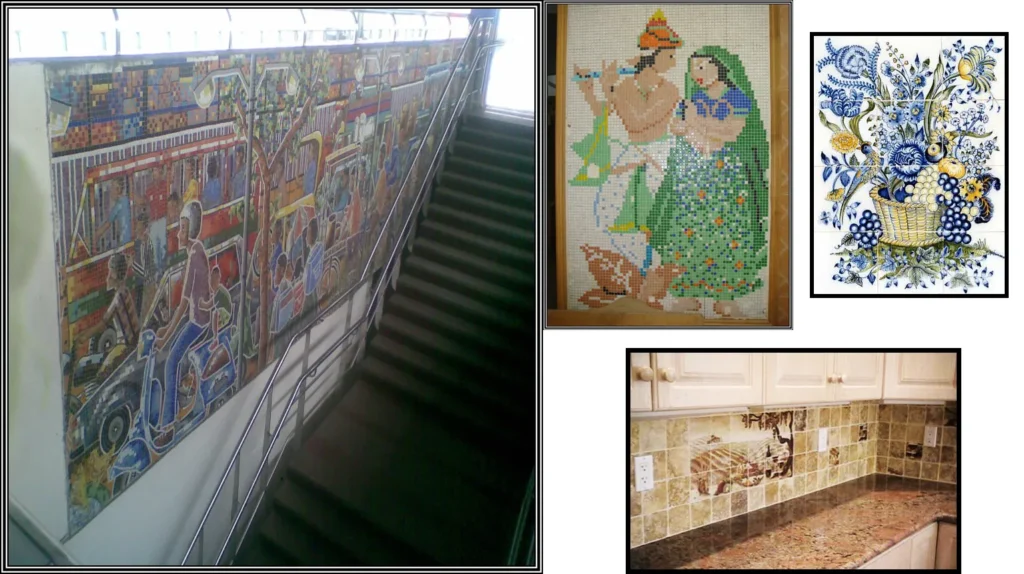
Tile mural
- Tile murals, as the name suggests, are first painted on the tiles and then fixed on the walls. Tile murals have the quality of making a cold, dull place look attractive and interesting.
- Ordinary bathroom tiles can be used for the purpose. The tiles are cut into pieces depending on the design.
- Many manufacturers also offer porcelain, glass.
Installation of mural
- Tile murals whether it is handmade tiles or ceramic, can be installed almost anywhere, historically however, the kitchen backsplash, bath enclosure, wine cellar, spa and cabana have been favored locations. Installation of a tile mural is relatively simple, using white cement.
- The use of sand-less grout has also been integral in preventing a tile mural being scratched during installation.
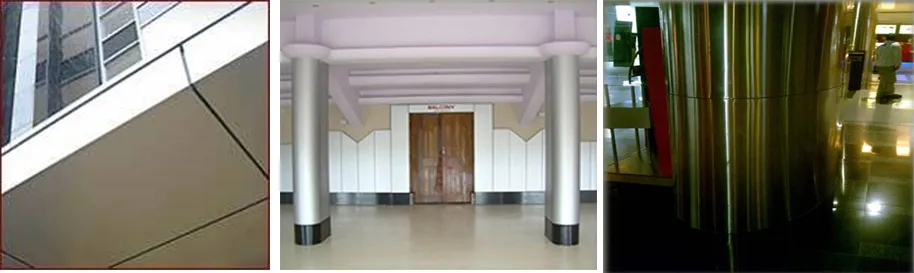
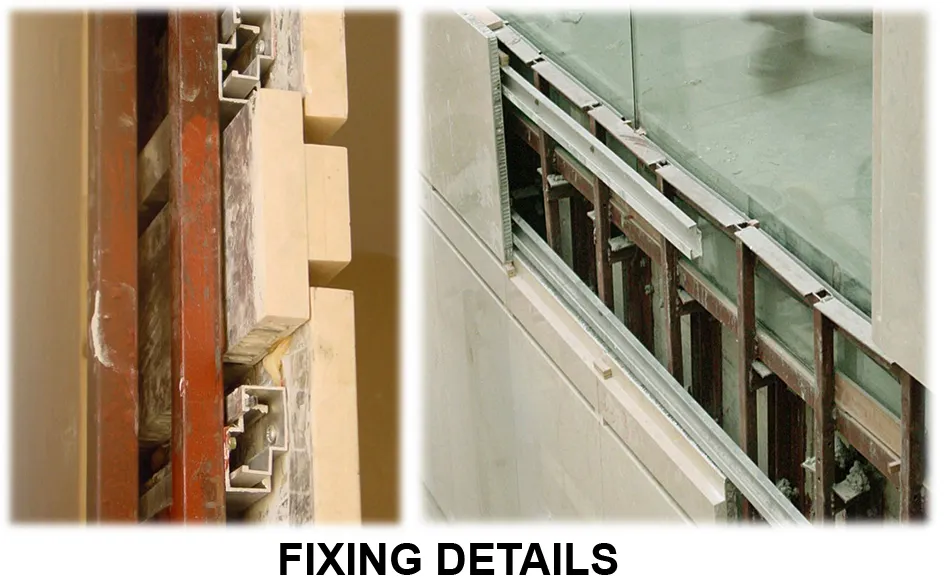
v) Cladding
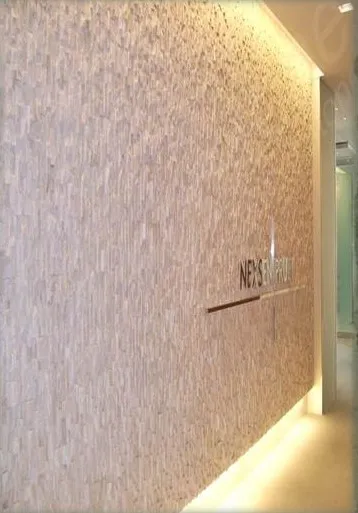
- This done mainly for aesthetic and protect from weathering effect. It provided strength to wall.
- It transforms a plane, uninspiring wall into a stunning feature wall, providing the simple yet defined geometry of a traditional stacked wall.
Aluminium cladding
- Aluminium cladding is done for all kind of internal and as well as external applications.
- Wall cladding
- Facades and rood edging
- Commercial internal decoration
- signs
- Tunnel linnings
- Display and exhibition stands and more…
Tile cladding
- Vitrified tiles
- Vitrified tile is a tile which has been processed in such a way that it has very low porosity (water absorption) which make it stain resistant and very strong. These are hard baked tiles in which colour and texture goes completely through. There is no surface glazing or designs on these tiles, as they are made for extreme wear and chemical resistance. They are usually used in commercial applications. Water permeation is usually less than 0.5%, which makes it the most stain and spill resistant as well as being suitable for both heavy traffic, internal and external use.
- Vitrified tiles are available in various colours:
- Off white, jaisalmer, light yellow, pink, green, nut brown, terracotta and mottled.
- The vitrified tiles are best of the materials available which ensures extra ordinary quality, high gloss, superior polished surface, desired functionality and durability.
- Vitrified tiles are designed to withstand rough & tough conditions.
- Vitrified tiles are resistant to chemicals, abrasion, fire & staining,
- Easy to maintain and ensures hygienic surroundings.
- Ceramic tiles
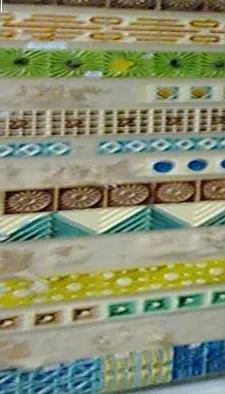
- Ceramic tile is tile made of clay.
- ceramic tiles, this includes mixture of clay, earthen elements, powders, water, and other minerals. Obviously cement based tile include cements and sands.
- After the formation of the tile body, ceramic tiles go through a firing process. Cement tiles are not fired.
- Often ceramics are covered in decorative. Waterproof paint like substances known as glazes
- Great care is taken in the proper mixture of these materials, as each one is critical to the success, quality and characteristics of the product produced.
- Other types of tiles
- Ceramic Mosaic Tile – tiles that are less than 6 inches facial area and may be either porcelain or natural clay composition and usually are 3/8″ or less in thickness.
- Quarry Tile – tiles made from the extrusion process from shale or natural clays and usually are 6 square inches or more in facial size and can be glazed or unglazed.
- Paver Tile – glazed or unglazed natural clay or porcelain tiles having a facial area of six square inches or more and made from the dust-pressed method.
- Wall Tile – glazed tiles with that are designed for indoor use and are generally non-vitreous.
- Mosiac tile
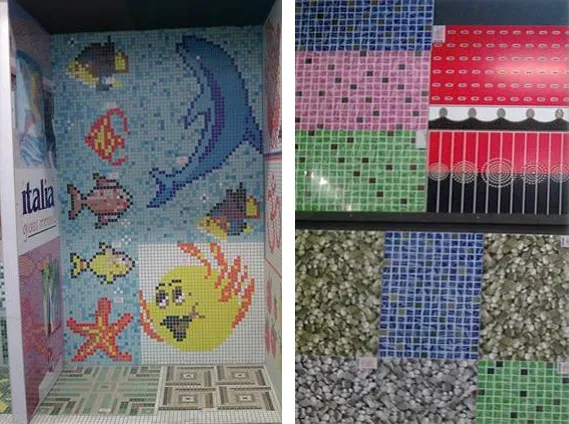
- Available in different colours and useful to give different types of patterns.
- Give artistic appearance.
- Application: In children room, In bathrooms, In swimming pools
Wooden cladding
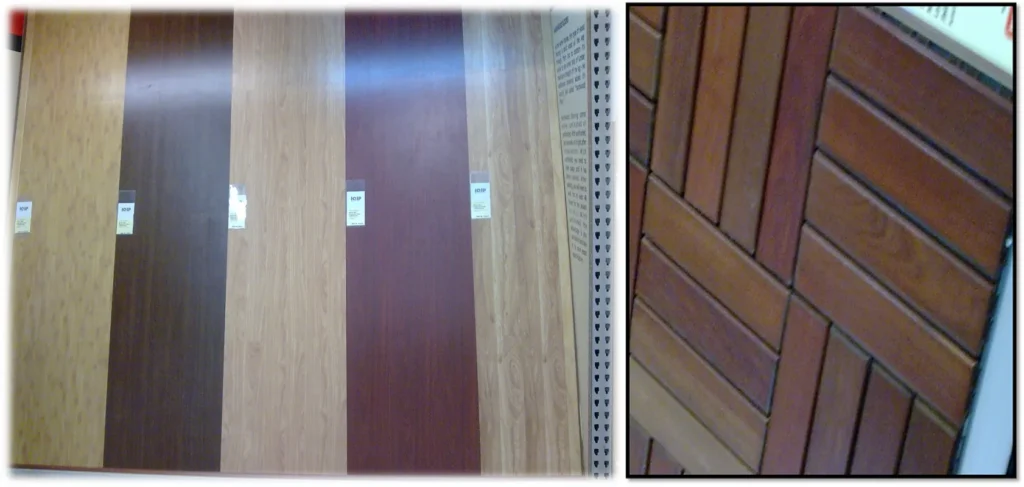
- Wall must be solid and dust free
- Divide the dispersion adhesive with a B2 toothed spatula (2.9mm teeth) (only use the amount you will process in one hour)
- Apply the first wall board aligned and level and and firmly press down the board with your hands
- Place the following boards in a butt joint bond
- Avoid coming out of adhesive, cut immediately if it does
- Turn the board around for cutting, carve with the cutter and break it(carve through with cutter for holes)
- For edge formation heat the protrusion with a hot air gun and press firmly ( remove fissures in edges with heat and a wooden wedge)
- For a bricked appearance, straighten the joints with heat and a wooden wedge.
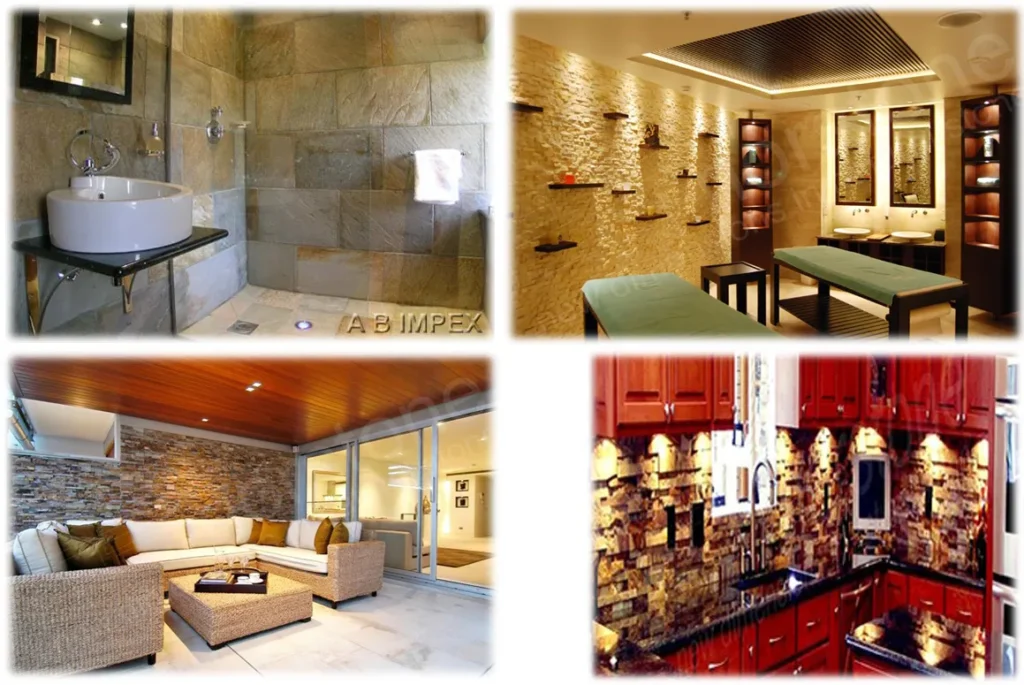
Stone cladding

- Stone cladding gives a weather resistant and long-lasting effect.
- Most durable and commonly used.
- Mostly used in external walls.
The type of wall finish you choose will depend on factors such as personal taste, budget, and the intended use of the space.

Tq for provide me this import massage
Desirable